


Why do we allow our kids to do crafts at every festival? Crafts help your children to sharpen their creative skills. They are a great way of introducing culture and teach them the importance of culture.
Hanukkah is the Jewish festival of lights. It is an eight night festival, bringing your home festive environment with the different crafts every day. Have a great family time in making these crafts. Encourage your kid to do an unique craft on each day of the festival. This festival is all about spending some time with the family and exchanging some valuable gifts with the loved ones.
This article discusses the story behind the Hanukkah. It presents some easy Hanukkah crafts for kids.
Story of Hanukkah:
It is an eight day Jewish festival. Thousands of people will gather in many places to light the menorahs. This event is accompanied by music, street food and carnivals. It has become a part of the American culture.
Hanukkah marks a historical event that took place in Jerusalem in the 2nd century BCE. In 168 BCE, the king Antiochus IV Epiphanes outlawed Jewish practice and forced the Jews to worship the Greek gods. The king defiled the Jewish temple and installed an altar to the Zeus Olympios and sacrificed the pigs. Small army of Jews called Maccabees rebelled against this religious oppression and they regained control over their temple.
Hanukkah Crafts for Kids:
Here are a few simple Hanukkah crafts that your kids can make:
1. Menorah for glass decoration:
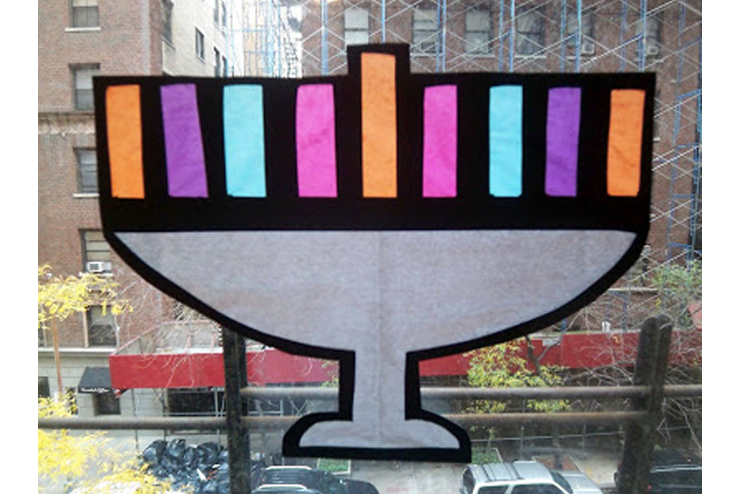
Menorah is the centerpiece for the celebration of the hanukkah. It can hold the nine candles in total. The eight candles symbolize the number of days that the temple lantern blazed and the ninth candle is the shamash, the helper candle used to light the other candles.
Things needed:
● Black construction paper
● White or light colored pencil
● Craft knife
● Silver tissue paper
● Colored tissue papers
How to make:
- Draw an outline of the menorah and candles on the piece of construction paper with a white or light colored pencil. Then cut out these shapes with the craft knife.
- Cut out the shape from a silver tissue that fits the shape of the menorah. Cut out the colored tissue papers that fit behind the cut of candles in the construction paper.
- Glue these pieces over the construction paper and glue this menorah with candle shapes as a decorative piece on the window. You can ask your kid to cut out some dreidels and start to decorate the menorah.
2. Washi tape menorah:
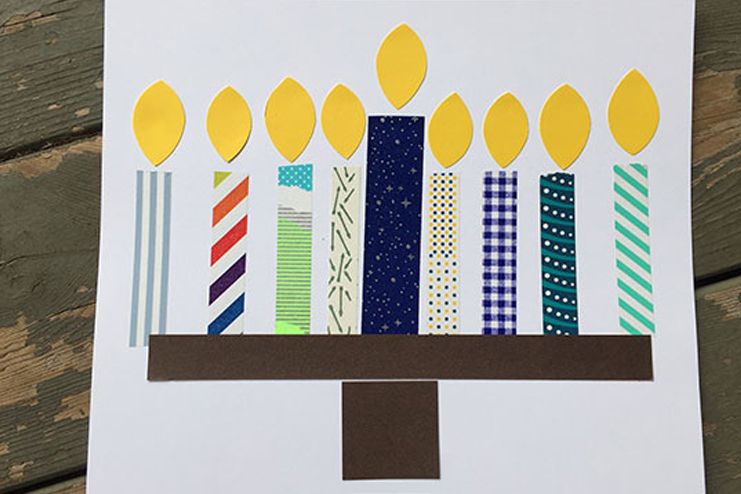
There are many reasons to use the washi tape for crafting. It is decorative itself and can be easy to fix anywhere to make things look good.
Things needed:
● Washi tapes of nine different colors and patterns
● Construction paper
● Plain card stocks of white, yellow and brown
● Glue stick
● scissors
How to make:
- Start your menorah with the shamash in the center and add slightly shorter pieces of washi tape on either side of it.
- Leave small space between the tapes to make a room for the flames.
- Cut out 9 small oval shaped yellow card stocks representing the flame and stick them over each washi tape.
- To finish this craft, make out the base for the candle holders from the brown card stock.
3. Clothespin menorah:
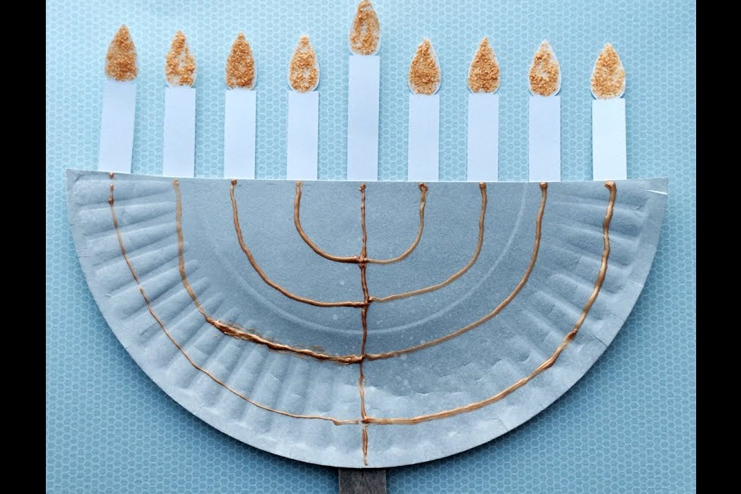
Clothespins are one of the easily accessible things to make the menorah.
Things needed:
● 3 Paper plates
● Clothespins
● Paints
How to make:
1. Fold the paper plate into two halves and cut out the two small circles from the remaining paper plates and fold them into halves.
2. Make two slits at the base of the bigger folded circle and place the rounded edges of the circles in the slits.
3. Make your child to add the clothespins on the top of this arrangement to represent the candles
4. you can ask your kid to color the clothespins with different colors and stick oval shaped card stocks representing the flames.
4. Star of David with popsicle stick:
This sparkly star of David looks lovely when hung near the windows or doors.
Things needed:
● 6 popsicle sticks
● White glue
● Glitter
How to make:
1. Take three popsicle sticks and put a small quantity of glue at the end of each and stick them to form the equilateral triangle. Do the same with the rest of the sticks and allow them to dry.
2. Take two triangles and glue them at the edges to make the star of David.
3. Sprinkle the glitters all over the star and leave it to dry. Turn it over and do the same.
4. Tie a thread at one of the edges of the star which can be used to hang it from anywhere.
Idea: You can also cut out your photo that fits into the lower triangle and stick a magnet at the back of it.
5. Dreidel banner:
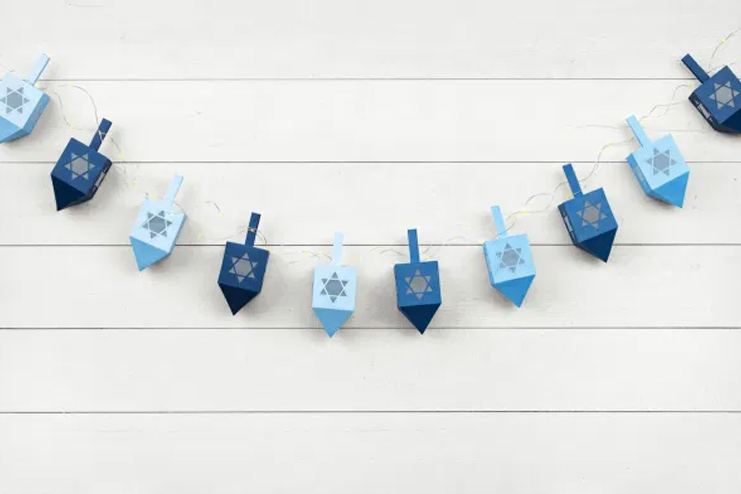
This sturdy craft will last for a year and is great way to make your child excited with fun.
Things needed:
● Acrylic craft felt
● Pen
● Scissors
● Craft glue
● String and tape
How to make:
1. Using your pen draw the shapes onto a piece of felt. Then use it as a trace to make the other dreidels for the banner.
2. Allow your kids to cut out various shapes from the felt experimenting their scissor skills. Decorate the dreidels with the small shapes.
3. Take a string of length that is enough to accommodate the dreidels and glue them over the string.
4. Leave it flat over the plain surface till it gets dry.
5. Sparkling dreidels:
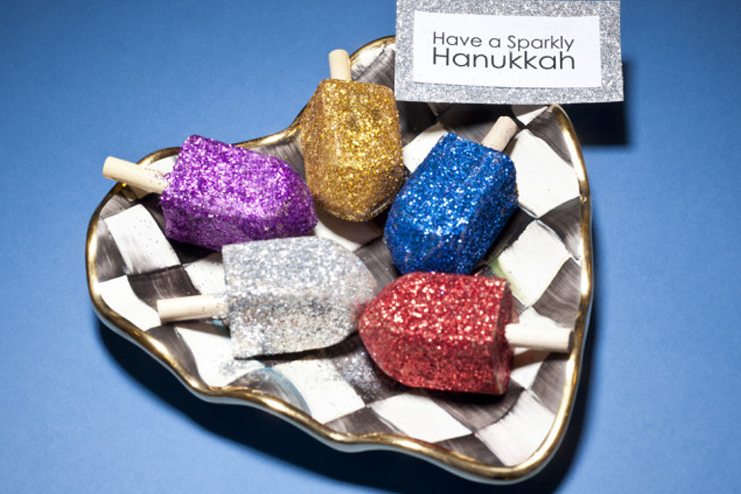
This is one of the DIY Hanukkah craft ideas for the kids. A coating of glitter can turn plain wooden dreidels to sparkle. You can also string them to make the shimmering garland.
Things needed:
- Different shades of glitters
- Wooden dreidels
How to make:
1. Allow your child to dip the plain wooden dreidels in the glitters of their choice. Coat the glitters with a layer of adhesives to ensure that they stick to the dreidels.
2. This is the best crafting activity to stimulate the motor skills in young kids.
6. Watercolor dreidels:

Make your child had a great time painting the lovely watercolour dreidels.
Things needed:
● Cardboard with the non glossy finish that will allow the water colours to be absorbed.
● Watercolours and brushes
How to make:
1. To give your kids a head start, cut out the dreidel shapes from the cardboard.
2. Ask your child to use the same template to make the multiples of the same shape.
3. Allow your child to paint the dreidels with the different watercolors. You can string them to make a hanukkah garland.
7. Star of David with the beads:
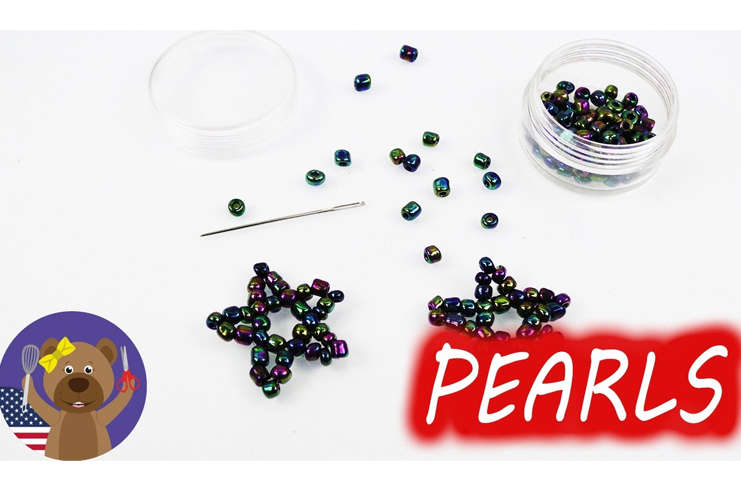
This is a unique colorful showpiece to enhance the motor skills and help them to achieve control over their hand movements.
Things needed:
● Clear plastic lid
● Craft glue
● Scissors
● Blue and sliver beads
How to make:
1. Trace out the shape of the star on the lid and apply some glue over the line.
2. Allow your child to put the beads over the glue.
3. Keep this arrangement till it gets dried completely.
8. Sand art menorah:
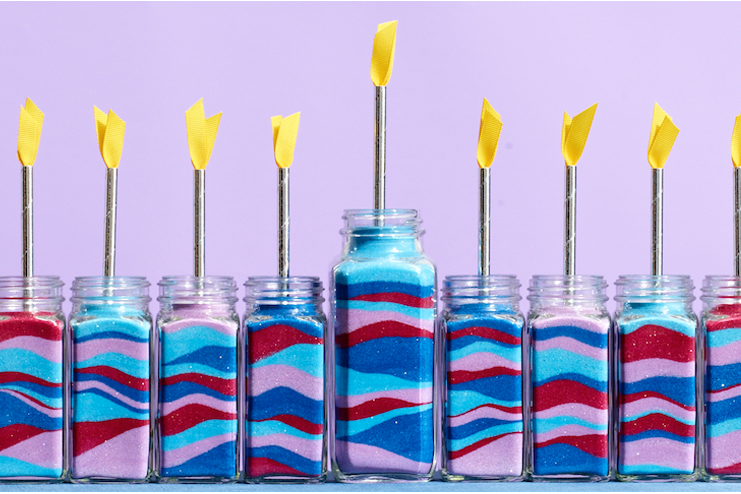
This is a simple art that the kids can do with the little assistance.
Things Needed:
- glass jars
- Multi colored sand
- Faux candle
How to do:
1. Take out the empty glass jars. You can use the empty jam jars for it.
2. Fill the jars with multi colored sand and ask your child to insert a faux candle into it.
3. Alternative to the real candle, you can make your older kid to make out a straw candle.
9. 3D Dreidel:
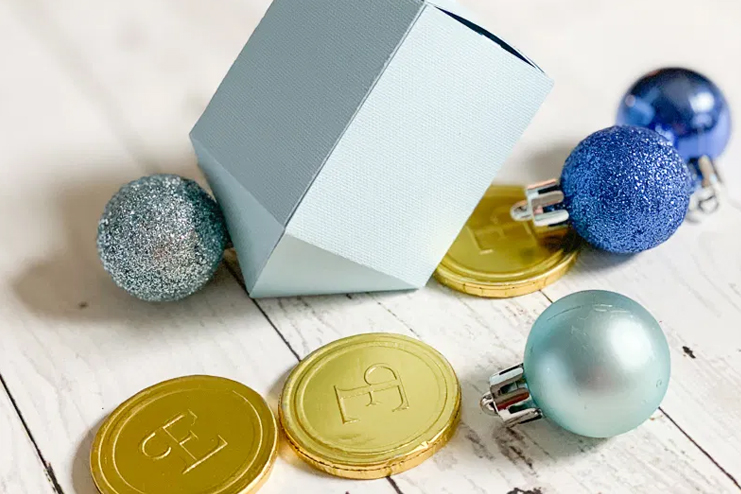
Allow your kid to decorate with the simple handmade dreidel.
Things Needed:
● Card stock
● White glue or double stick tape
● Scissors
How to do:
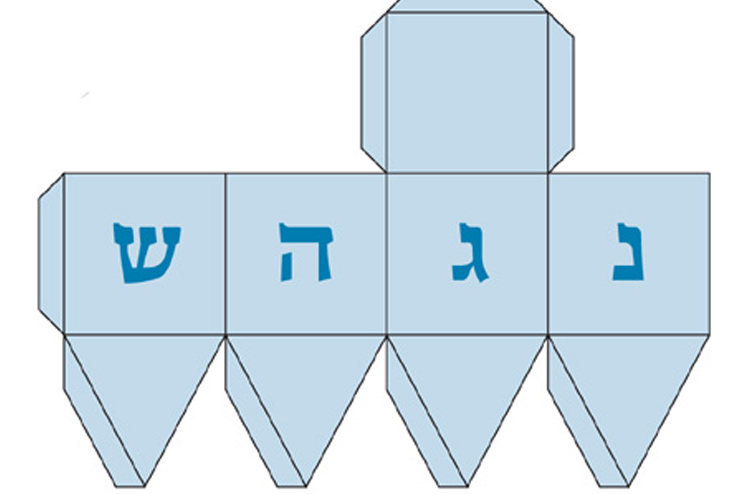
1. Take the card stock and use the template below to make the dreidel.
2. Help your kid to make cut along the edges and join the ends to make the dreidel.
3. Ask your kids to decorate the dreidel with colors or by using the glitters.
4. To make it more comfortable for holding allow your kid to poke a pencil at the middle of the base for the dreidel.
10. Dancing characters:
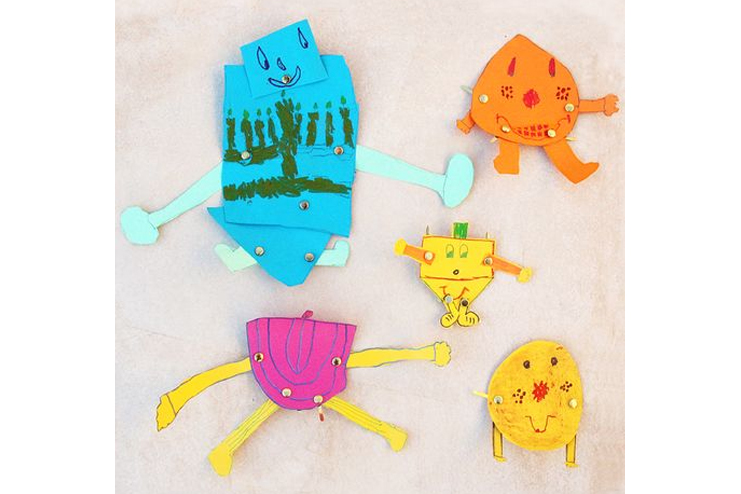
This is a great idea to add some cheer to your home during this hanukkah. Dancing dreidels, doughnuts, menorahs, oil flasks may sparkle the festive mood
Things needed:
- Colorful cardstock
- Paper fastener
- Pens and markers
How to do:
1. Allow your kid to draw the head, arms, and legs on the separately on the colored paper of their choice.
2. Add the details with color pencils and punch holes wherever needed.
3. Attach head, arms, and legs with the paper fasteners.
11. Hanukkah cards:
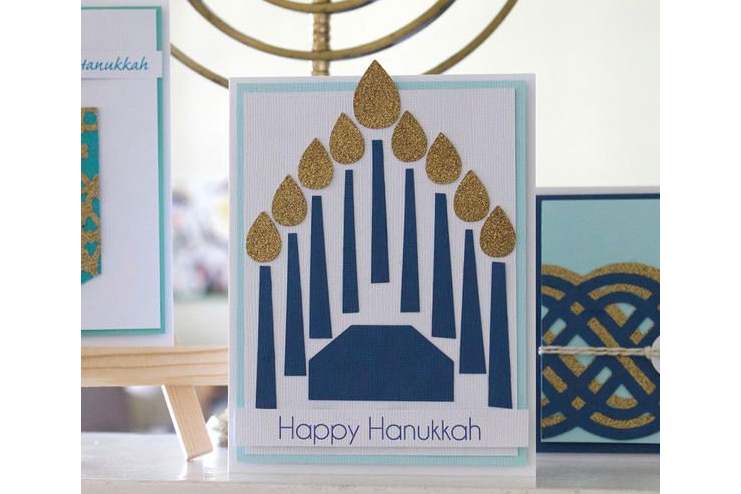
these crafts are the best way to foster the creativity in your child with the very little supplies.
Things needed:
● Coloured card stock
● Glitters
● scissors
How to do:
1. Allow your kid to make the rough work of the card that they wan to make.
2. Ask your kid to take the card stock and fold it exactly to half make it look like a greeting card.
3. Cut out the shapes to paste onto the greeting cards. If your kid can not make out the shapes, help them in drawing and cutting them.
4. Encourage your kid to write some message inside the card and decorate using the glitters.
12. Egg Carton Menorah:
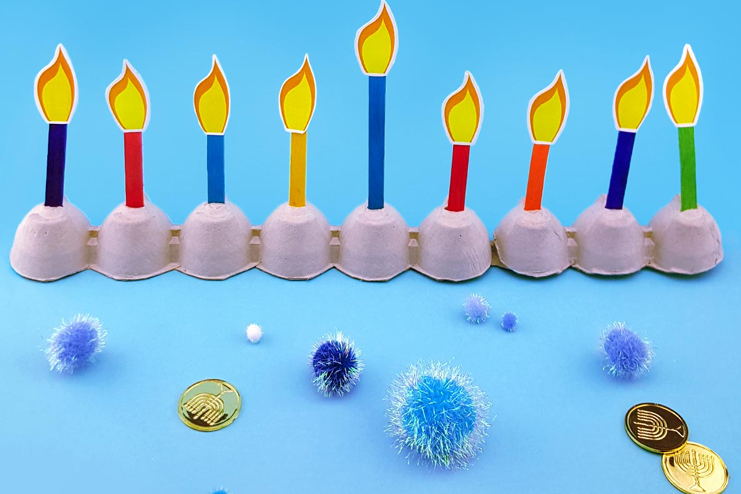
This is a simple toddler hanukkah craft can be made with the minimal things. This is one of the best recycling activities for kids.
Things needed:
● empty egg cartons
● scissors
● glue, tape, stapler
● paints
● Q-Tips
● Pom poms
How to make:
1. To start with this craft, divide the empty egg carton to make the two halves with the six sections on the each strip. cut the one half from one of the carton and attach it to the longer carton so that you have the egg carton with nine sections in total. You can use the glue or double tape to attach the cartons.
2. Paint the nine section carton with the blue color and fill them with pompoms to make out the base for the Q-tips.
3. Poke Q-tip through the pom poms in each section.
13. Milk carton dreidel:
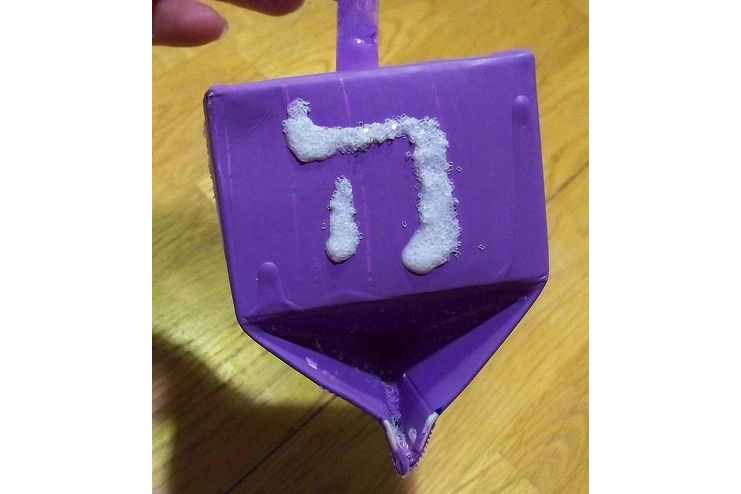
This is one of the best hanukkah craft for toddlers. This craft teaches the kids recycling along with the tradition. Here is the procedure foe making the milk carton dreidel.
Things Needed:
● Empty milk or juice carton
● Glue
● Scissors
● Card stock
● Colors for the decoration
How to make:
1. Take the empty milk carton and mold it in the shape of the dreidel as shown in the figure.
2. Close the base of the dreidel with glue and poke the strip of the card stock or the straw from the center of the base.
3. You can allow your kid to do the finishing for this craft with colors, and glitters. They can write down or draw something on the dreidel once the colors are dried out completely.
14. Hand print menorah:
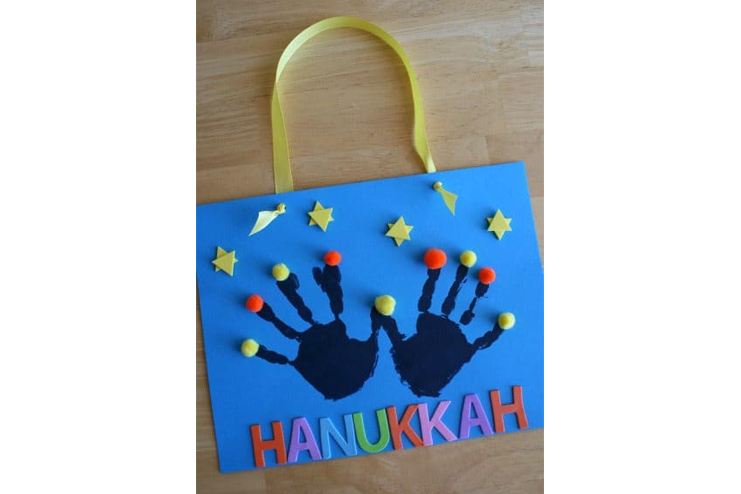
This is one of the best hanukkah crafts to make with the kids. With this craft you can allow your toddler to take an active part in the festival and offer them the memorable moments that last forever.
Things Needed:
● Thick paper or any other paper bag for the hand print
● Pom poms
● Glue
How to make:
1. Take the paper bag or the paper and grease your kid’s palms’ with some washable paint.
2. Ask your kid to maintain some distance between the fingers and ensure that the thumb tips should touch each other.
3. Allow the kid to make the impression on the paper or bag without disturbing the position of the palms.
4. Allow your kid to put some glue at the tip of each finger to stick the pom poms.
5. You can allow your kid to fill the leftover place of the paper with some star symbols.
Alternate: you can also use the thumb impression of your kid in the place of the pom poms to make the craft quite more natural.
15. Tissue roll menorah:
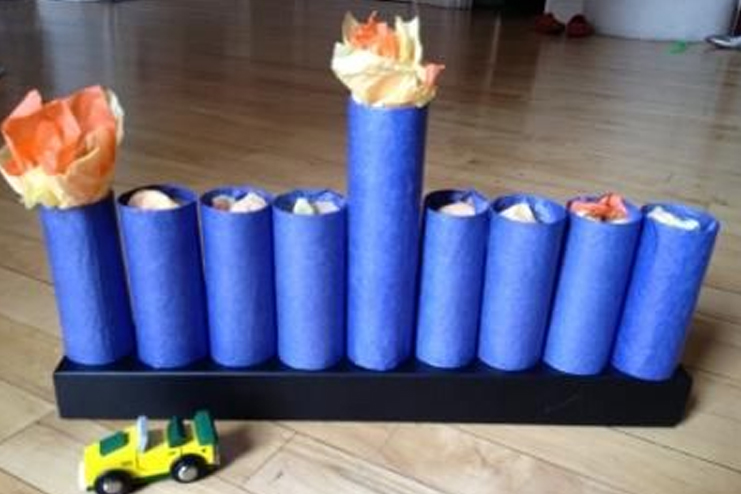
Even your toddler can do this craft very easily. Here are the things that you require to do this menorah.
Things Needed:
- Tissue roll
- Card stock
- Glue
- Scrap of papers
How to make:
1. Take the 9 empty tissue rolls and ask your kid to cover base with the card stock and glue it.
2. Ask them to place them on a table with little gap between them after coloring.
3. Take piece of papers and put them in the each tube representing the candle flame. Alternative to the paper you can use the straw with cardstock piece attached to it.
4. You can allow your kid to decorate each tube with stars and some symbols that they like.
In conclusion, crafts are the great way to make your kid explore the meaning behind the celebration of Hanukkah. Celebrate each night of the festival with the different crafts and the recipes. Get your entire family into the fun and joy of celebrating the Hanukkah with the crafting.


